I recently had the opportunity to teach a class about furniture and cabinet painting and re finishing. This was such a fun topic to talk about. Finding old and dis-guarded furniture and giving it new life is what I love doing most. My family jokes with me that besides my piano, no piece of furniture is safe around here. It is true. What better way to transform a room than to give the pieces in that room some new life. If you can do that for just a few bucks worth of paint….even better right. Here are some fun tips and tricks I have learned along the way through my own trial and error that I want to share.
First I am always asked how I prep the furniture that I am going to paint. Let’s say I am doing a kitchen full of cabinets. With so many doors and drawers, sanding each one seems like a way daunting task. I have found a product that I use not only on my cabinets, but the furniture both wood, or already painted.

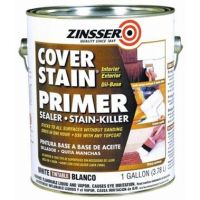
I first remove my cabinet doors and all of the hardware laying them on cardboard large pieces of cardboard. I love painting on cardboard because you don’t get the goop on the sides of the doors you get when you lay them on plastic. Then I look at the cabinets and see if there are any spots that need actual sanding or if there are any holes to be filled with putty. After that is done I take a clean rag and wet it with the sander deglosser and go to work wiping them down. The great thing about this product is that it both cleans and sands your cabinets. Two steps in one. Next I prime the cabinets with Zinnser primer.

This is the primer I love using. They have many types of primer, but I this oil base primer works great. You can still paint water based paints over it. I brush on the primer, doing two coats, and sanding between each coat. After the cabinets are primed, I move onto paint. I always have just used regular satin finished wall paint from Lowes or Home Depot. I paint two coats, usually using a foam roller. This has always given me the desired finish that I am trying to achieve. When I am painting my cabinet doors, I always start painting the backs first, then when they dry, usually overnight, I flip them over to do the front. I do not install them back onto the cabinets until giving them a good 24 hours of drying time. I never fully shut my cabinet doors or drawers for a week after painting them. If you want to sand the edges for a more distressed finish, always wait at least a week before sanding them.
While looking for ideas on pinterest, I came across this inventive idea from This Old House.

When your cabinets are done, don’t forget the hardware. Nothing transforms cabinets or a piece of furniture than the knobs. I love to take chunky knobs and spraying them a fun glossy color.
It adds such a pop of personality to the room. It is amazing how some work and some paint can give a room new fun life.
You Might Enjoy


